
Table of Contents
- Choose Your Hardwood Flooring
- Acclimate the Hardwood
- Prepare the Subfloor
- Plan the Layout
- Install the Hardwood Flooring
- Finishing Touches
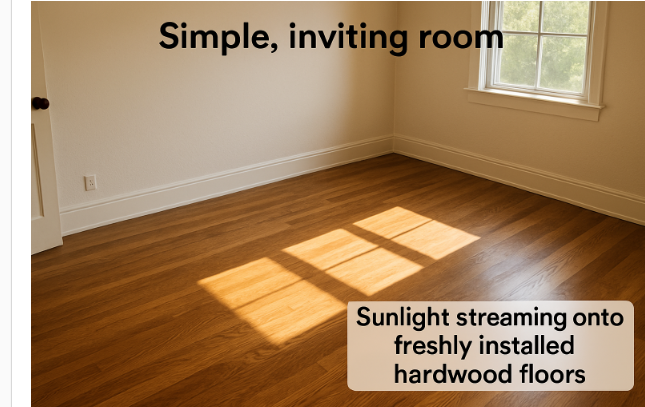
Imagine the feeling of stepping into a home transformed by the unrivaled elegance, comfort, and warmth of genuine hardwood flooring. Hardwood floors don’t just add a touch of sophistication; they create a welcoming and timeless atmosphere while enhancing resale value and functionality. Whether your goal is to upgrade your space for personal enjoyment or prepare your home for the competitive real estate market, a well-selected and expertly installed hardwood floor becomes a defining feature of any interior. If you’re considering making this impactful upgrade and seeking expert assistance in Colorado, be sure to explore hardwood floors Fort Collins for professional guidance and design inspiration. By following this comprehensive, step-by-step installation guide, you can achieve professional-quality results that will bring lasting beauty and satisfaction to your home for many years to come.
This detailed article is crafted to walk you through every decision, preparation step, and essential installation technique involved in a successful hardwood flooring project, making even a first-time DIY installer feel confident every step of the way.
Choose Your Hardwood Flooring
The foundation of your new floor and the key to project success begins with choosing the type and style of hardwood flooring best suited for your space and needs. The market offers a wide array of options, each with its unique advantages and aesthetic appeal. As explained by HowStuffWorks in their overview of hardwood flooring basics, understanding the differences between solid and engineered wood, as well as various finishes and wood species, is essential to making an informed decision that aligns with both your lifestyle and budget.
- Solid Hardwood: Made entirely from single pieces of wood, solid hardwood floors exude luxury and substance. They can be sanded and refinished multiple times throughout their lifespan, making them an excellent long-term investment. Solid hardwood is particularly suited to dry, stable environments such as living rooms and bedrooms, where it can shine for generations.
- Engineered Hardwood: Engineered floors are constructed with a genuine hardwood veneer layered over high-strength plywood or fiberboard. This ingenious design provides greater stability against fluctuating humidity or temperature, making it ideal for moisture-prone areas like basements or kitchens. They resist warping and are often available in wider plank sizes for a modern look.
Beyond composition, consider your aesthetic preferences and household needs. Classic oak and hickory are prized for durability and visible grain, while maple and cherry provide smoother, contemporary finishes. Pre-finished planks expedite installation and offer added durability, whereas site-finished options allow for greater customization. And don’t overlook the finish—matte, satin, and high-gloss sheens each convey a different style and influence day-to-day maintenance. By thoughtfully weighing these options, you’ll lay the groundwork for a floor that perfectly complements your interior design and lifestyle.
Acclimate the Hardwood
One of the most crucial yet frequently underestimated steps is allowing your hardwood planks proper time to acclimate to your home environment. Failing to acclimate can lead to costly issues, such as buckling, warping, and unsightly gaps, once the floors are installed. Place the unopened boxes of your hardwood flooring in the room where they’ll be installed for at least 72 hours. Keep the space at normal living conditions—ideally between 60–80°F and 35–55% relative humidity—to allow the wood to adjust its moisture content gradually. This natural adaptation ensures your new floor will settle in place smoothly and remain dimensionally stable over time. Taking the time to acclimate now will protect your investment and help guarantee a beautiful result, free from future surprises.
Prepare the Subfloor
Subfloor preparation is the silent hero of every successful hardwood floor installation. A clean, level, and stable base ensures your new floor lays flat, feels solid underfoot, and stands the test of time. Here’s how to get it right:
- Clean: Begin by removing any existing flooring, along with all debris, nails, dust, or adhesives. A spotless surface prevents imperfections from telegraphing through the new wood.
- Level: Use a long level or straight edge to check the subfloor for any unevenness. Sand down higher areas, and fill low spots with a leveling compound. Slight undulations may seem insignificant, but can lead to creaks, movement, or premature wear.
- Dry: Moisture is hardwood’s worst enemy. Use a quality moisture meter to check the subfloor’s moisture content, and be especially diligent on concrete surfaces where vapor barriers are a must. This is essential for avoiding mold growth, warping, or adhesive failure over time.
By dedicating effort to prep work, you actively extend the life and beauty of your new hardwood floor, ensuring it remains a source of pride for decades.
Plan the Layout
The visual impact of a hardwood floor comes not only from the materials chosen but also from how they are arranged. Thoughtful layout planning sets the stage for a harmonious and structurally stable installation. Begin by considering plank direction—running them perpendicular to floor joists enhances stability and often optically expands the appearance of the space. Stagger plank end joints in each row by at least 6 inches for a natural, seamless look and added strength.
Carefully measure the total width of the installation area, and divide by the width of your planks. This will indicate if the final row will be too narrow. If so, you can redistribute plank widths at the start to ensure symmetrical and balanced edge rows, which looks more polished. Also, plan around features like doorways or fireplaces in advance, as these details influence where you begin and end each run. Taking time to visualize the final layout helps avoid surprises and promotes a professional finish.
Install the Hardwood Flooring
The method you use to install your hardwood flooring depends on both your product choice and the type of subfloor you have. Here are the main installation techniques:
- Nail-Down: Most common for solid hardwood over wood subfloors. Planks are secured with specialized flooring nails or staples along their tongue edge, which are then concealed in the finished floor. This method delivers excellent holding power and a classic, old-world feel beneath your feet.
- Glue-Down: Often preferred for engineered hardwood or when installing over concrete. Use a troweled adhesive to firmly bond each plank to the subfloor, minimizing movement and dampening sound. It’s essential to use the manufacturer’s recommended adhesive to guarantee longevity.
- Floating: Many modern engineered wood floors utilize a click-lock system, where planks are snapped together and “float” over a foam underlayment. This is a great DIY option, allowing for efficient installation and easy replacement if needed.
Always start your installation along the longest and straightest wall in the room, ensuring a true first row. Leave a 3/4-inch expansion gap around the entire perimeter to allow the wood to expand and contract naturally, especially in climates with notable seasonal variations. As you move, frequently check for straightness and tight seam fits. According to This Old House, taking the time to work carefully and methodically can help even first-time installers achieve a seamless, professional-quality floor.
Finishing Touches
With the flooring installed, focus on the details to achieve a flawless, finished appearance that no one can ignore:
- Fill Gaps: Use a matching wood putty or filler to conceal minor imperfections, nail holes, or slight gaps, achieving a cohesive finish.
- Baseboards & Trim: Reinstall or update baseboards and shoe molding, positioning them to cover the expansion gaps. Be sure not to anchor trim directly to the flooring, as this can impede necessary movement.
- Cleaning: Vacuum thoroughly to remove loose debris, and damp mop using a hardwood-specific cleaner to lift any adhesive marks or dust. Allow the floor to “breathe” and settle for a day or two before moving back heavy furniture or rugs.
Attention to these final touches allows your flooring project to shine truly, enhancing not only its practical performance but also the overall beauty and craftsmanship of your home.